IMPORTANT: there are several requirements needed to make sure that remote desktop will work, you will need to talk with your local IT support to insure it is enabled and configured for you. In some instances a reboot will be needed prior to RDP being activated.
Additionally, make sure of the following:
- Your office computer must be turned on! Do not shutdown when you leave for the day (lock the screen or logoff, but do not shutdown).
- You will need the UF VPN installed and logged in prior to starting your remote desktop session.
- You will need to know the IP address or Domain name of your work group. (See this KB article on how to find this information.)
Step 1: Login to the VPN
Follow the instructions to login to the UF VPN so that the connection to your work computer is possible.
Step 2: Run the Remote Desktop client.

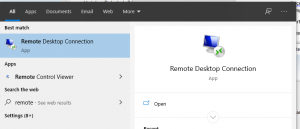
On a Microsoft Windows computer run the Remote Desktop Connection client which is found in the Windows Accessories folder in the Microsoft applications menu. You can also use your search bar to find the application.

On a macOS computer, run the Microsoft Remote Desktop app. If you do not have it installed, find it in the Mac App Store and install it.
Step 3: Connect to your desktop computer
If this is the first time running the remote desktop client you will need to add your computer connection. If you’ve done this before, simply click the Connect button (Windows) or double-click your saved PC (macOS) to start the connection.
To add your computer simple enter the computer name or IP address that your IT support provided for the Computer: field (Windows) or the PC name field after clicking Add PC from the Connections menu (macOS). There are a few other simple steps to complete under macOS to safe this new PC connection that should be self-explanatory.
Both clients provide advanced and extra options for tuning your remote session. The default settings are usually fine for anything your would need to do.
Step 4: Login
Your username should be entered as either ufad\[gatorlink] or [gatorlink]@ad.ufl.edu. If prompted you will need to accept a security certificate to complete the connection.
Step 5: Work
You are now logged onto your work computer and should see your usual desktop. Conduct your work as usual.
Step 6: After completing your remote desktop session
When you are done working remotely you can click your Windows button to either logoff or disconnect. Disconnecting will leave your office computer in the state when you disconnected (open programs and files will be left active, essentially like walking away from your computer and letting it lock).
Do NOT use the Shutdown option from the Windows Power menu or your computer will not be available the next time you attempt to connect with Remote Desktop!